

Digital event tickets can be added directly to Apple Wallet and Google Wallet, giving attendees quick access to their ticket details and entry barcode from their phone.
This guide explains how to create Apple Wallet and Google Wallet event tickets with Passlet, personalize them with registration data, limit each ticket to one successful scan, and validate admission using the Passlet Scanner iOS app.
Passlet lets you design Apple Wallet & Google Wallet passes from one template. Tickets can be issued manually through the Passlet portal or automatically through the REST API.
For this example, we will create a one-time event ticket for the fictional European Design Forum 2026. Each attendee will receive a digital ticket containing their name, ticket type, seat, event date, and a unique QR code.
The first valid scan will admit the attendee. Passlet will then void the ticket automatically so it cannot be used again.
Why use Apple Wallet and Google Wallet event tickets?
Mobile wallet event tickets give attendees an alternative to printed tickets, PDF attachments, and QR code screenshots.
With Passlet, you can:
- Create native passes for Apple Wallet and Google Wallet
- Personalize tickets using attendee and registration data
- Generate a unique barcode for every pass
- Limit each event ticket to one successful scan
- Issue passes manually or through a REST API
- Send wallet links through email, SMS, a registration system, or a CRM
- Scan tickets using the Passlet Scanner iOS app
You can complete the initial setup through the Passlet portal and add API automation when your registration workflow is ready.
What we are building
Our example event ticket will use the following information:
1. Create a project for your event
Sign in to the Passlet portal, then open Projects from the navigation.
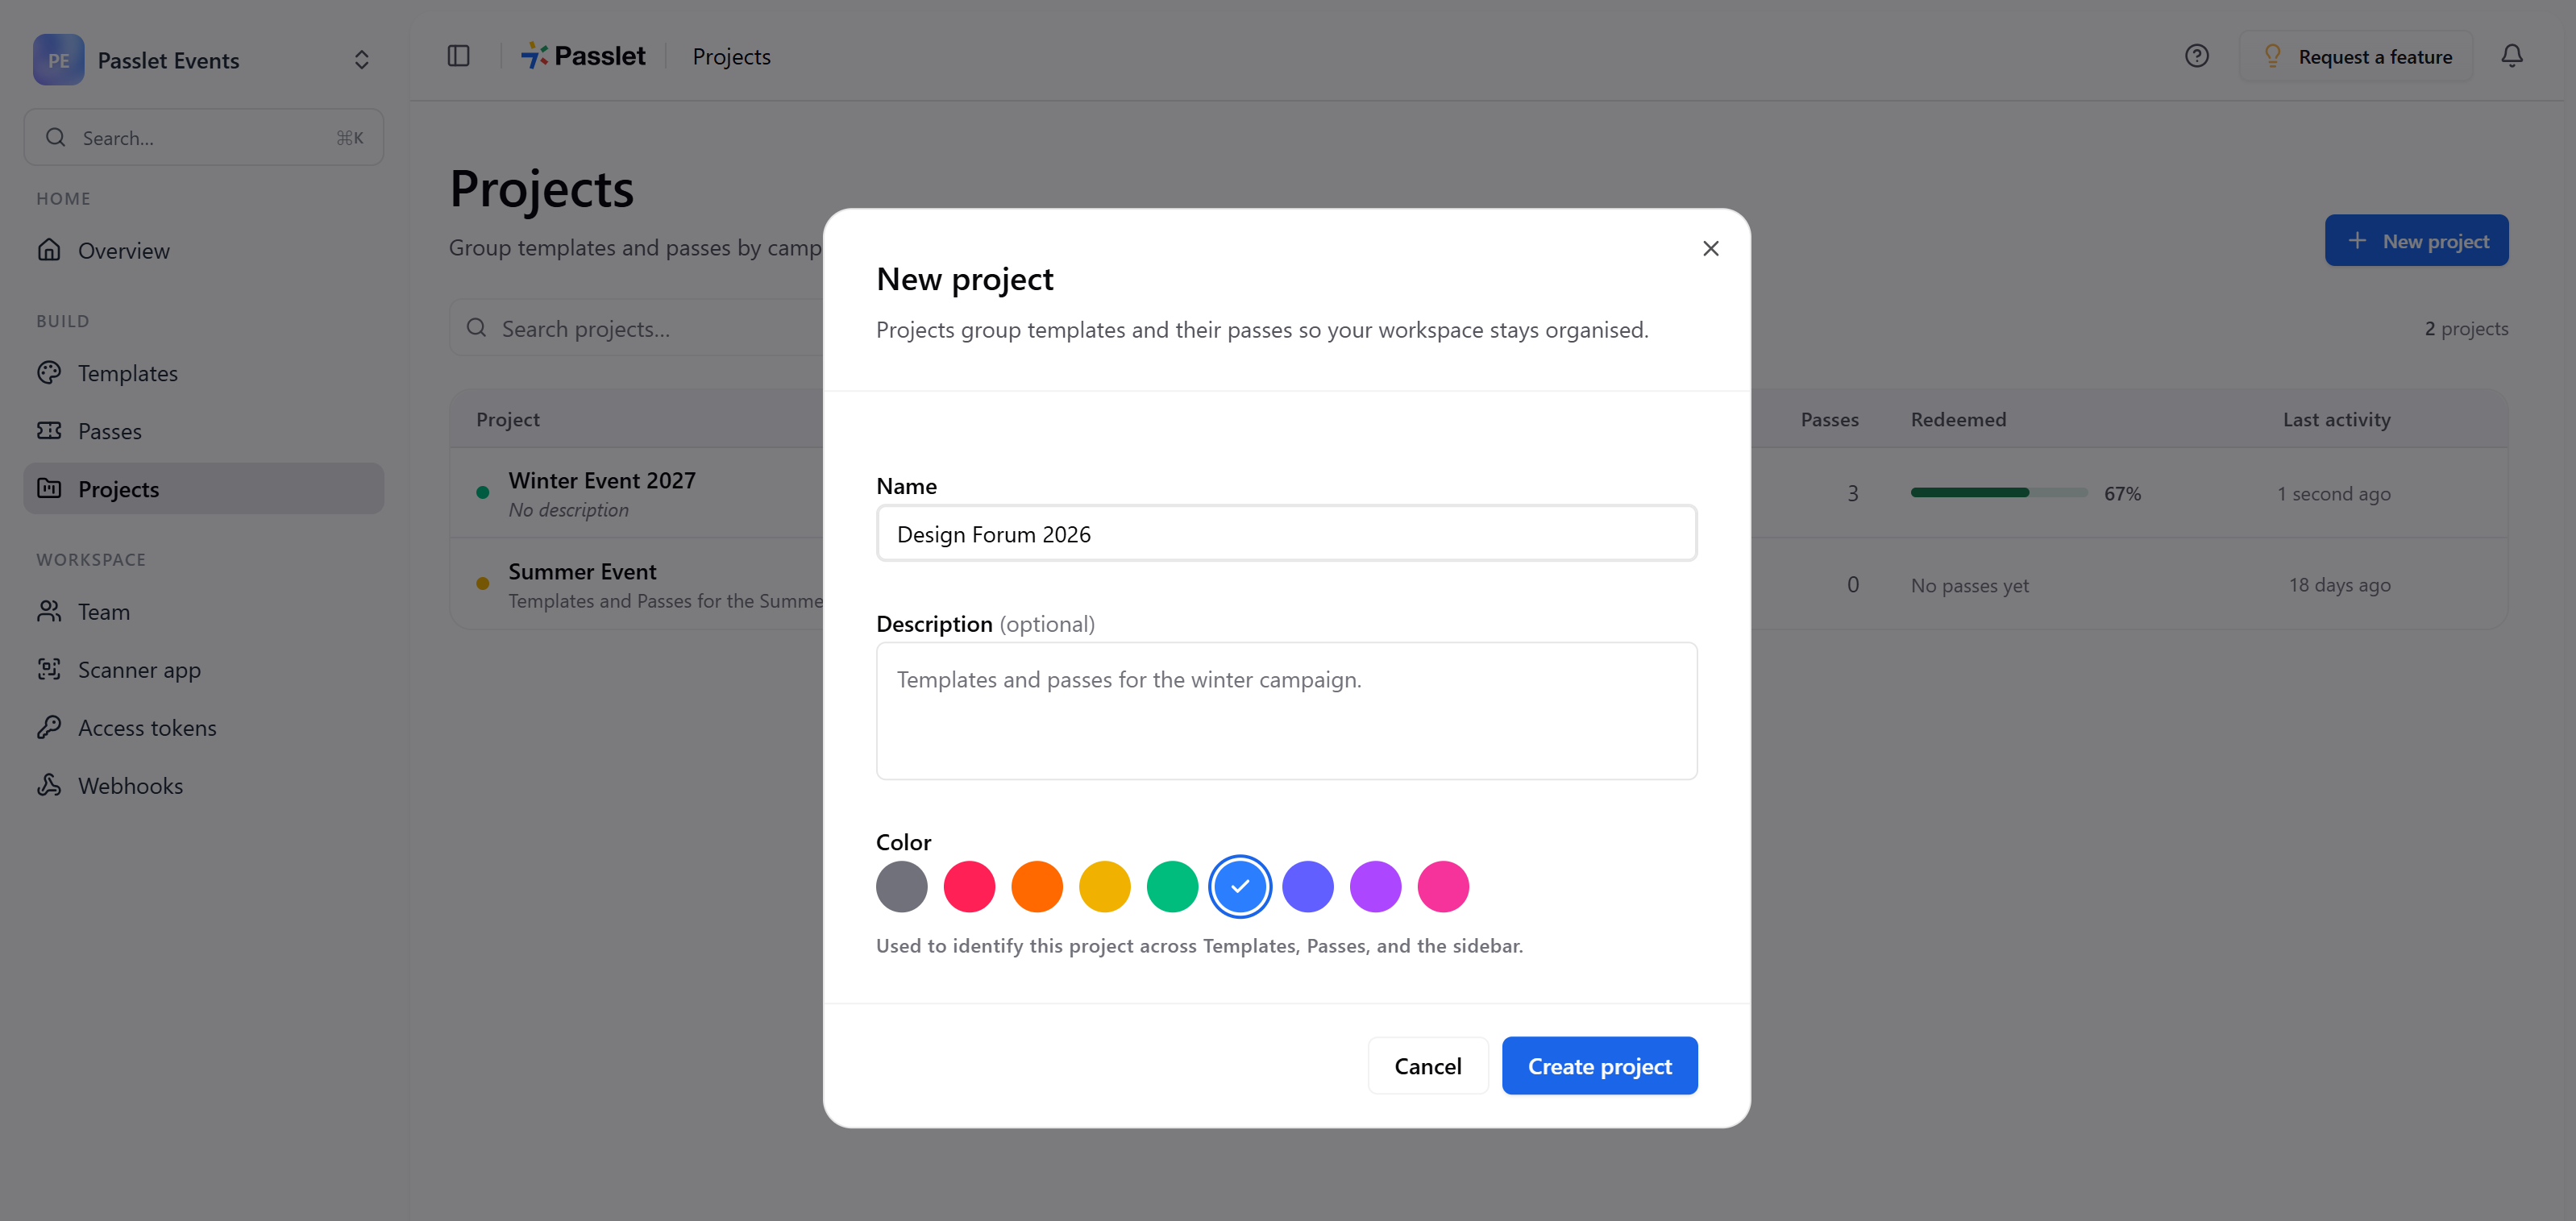
- Click New project.
- Enter
Design Forum 2026as the project name. - Add a description such as
Apple Wallet and Google Wallet event tickets for the Design Forum. - Choose a project color.
- Click Create project.
Projects group related templates and passes. They are useful when you manage multiple events, customers, campaigns, or locations.
The project itself does not change how a pass behaves. It keeps your event tickets organized and gives your scanning team a clear project to select in the Passlet Scanner app.
2. Create an Apple Wallet and Google Wallet ticket template
Open the project you created and select View templates. On the filtered Templates page, click Start blank.
The Create template dialog asks for two things:
- Enter
Design Forum Event Ticketunder Name. - Select both Apple Wallet and Google Wallet under Wallets.
- Click Create.
One Passlet template can support both wallet platforms. You can design the Apple Wallet pass and Google Wallet pass in the same editor while sharing attendee variables and scanning rules.

Choose the Event Ticket layout
In the Apple Wallet editor:
- Open Design.
- Find Pass Layout.
- Select Event Ticket.
- Add your event logo, colors, background artwork, and visible ticket fields.
Blank Apple Wallet templates start with the Event Ticket layout, but it is worth confirming this before publishing. The Apple pass layout becomes locked after the template is published for the first time.
Use the Apple and Google tabs at the top of the editor to preview and configure each wallet design.
Add variables for personalized tickets
Variables are placeholders that receive a different value for every issued pass.
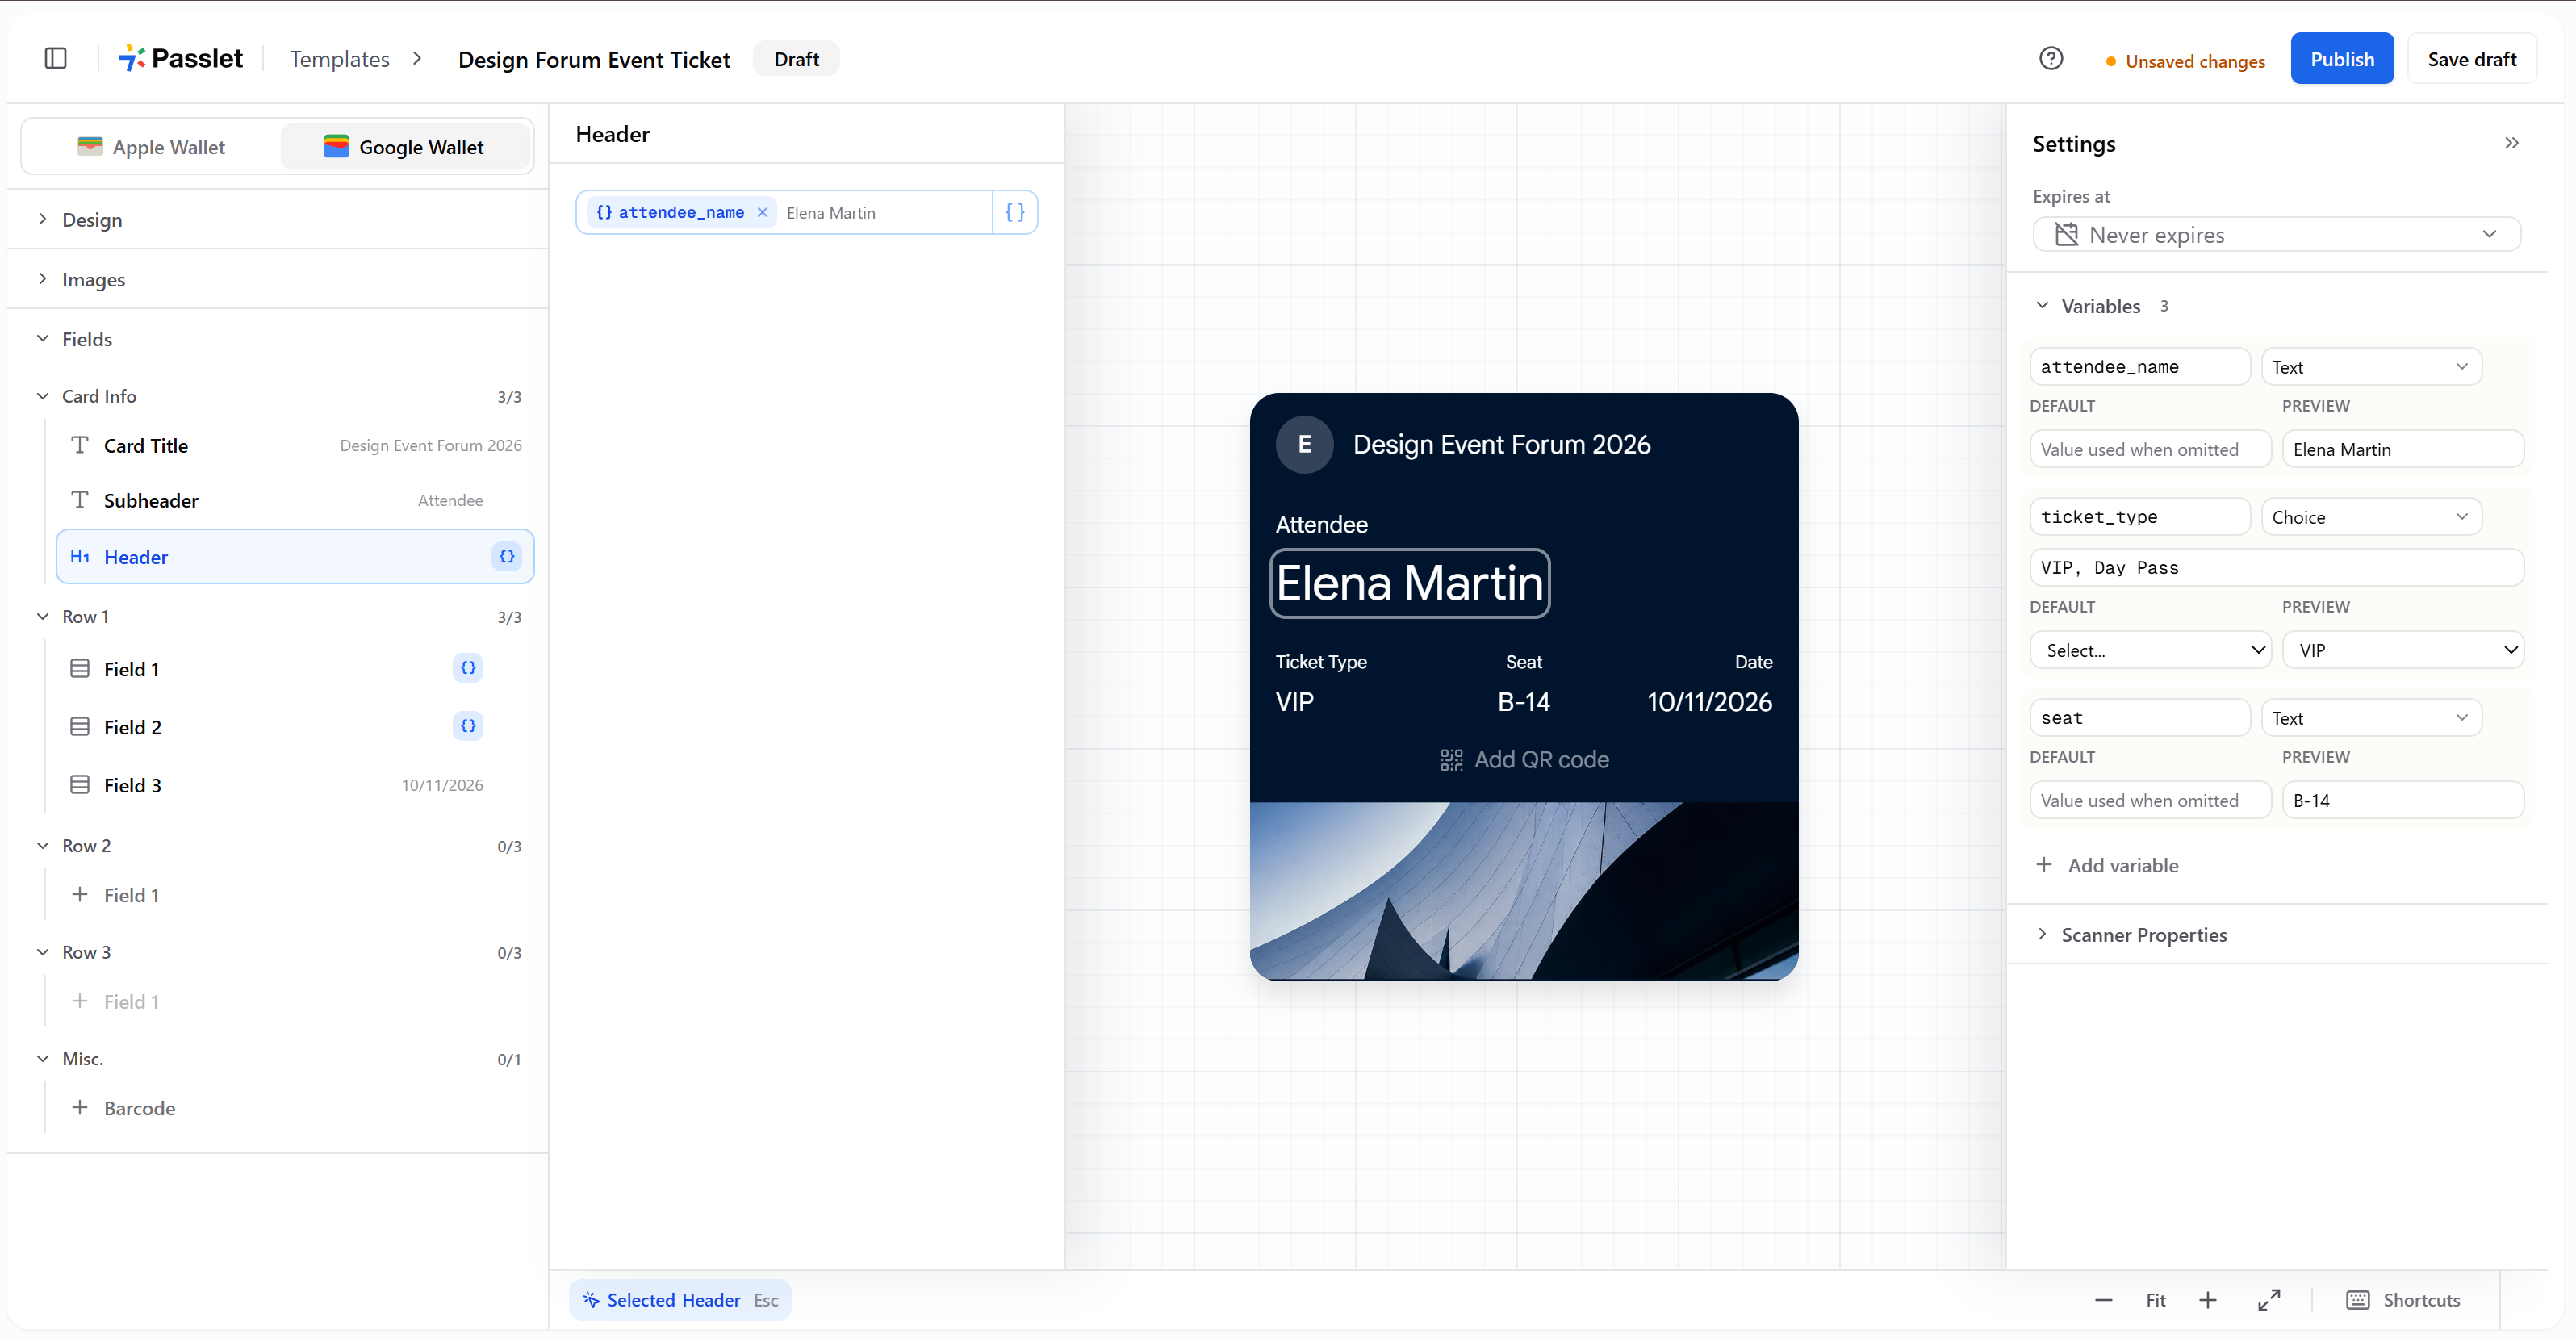
Open Settings, expand Variables, and click Add variable for each value you want to personalize.
For this example, create the following variables:
For ticket_type, add choices such as VIP and Standard.
The preview value lets you check how realistic content fits into the wallet design. The actual value is entered when you issue each ticket or supplied through the Passlet REST API.
Next, bind the variables to visible fields in both wallet designs. For example:
- Bind
attendee_nameto an attendee field. - Bind
ticket_typeto a ticket type field. - Bind
seatto a seat field. - Use fixed text for the event date as it is identical on every ticket.
Switch between the Apple and Google tabs and confirm that each mobile event ticket displays the correct information.

3. Configure a one-time scannable barcode
Open Scanner Properties in the template settings.
Enable a system-generated barcode
Turn on System-generated barcode. Instead of binding your own unique code to the barcode, you can let Passlet handle that for you.
Passlet will create a unique, signed barcode for every issued pass and bind it to both wallet designs. You do not need to generate barcode values in your registration system or make sure that manually entered codes are unique.
The editor also creates a read-only scanToken system variable. Passlet fills this value automatically when each event ticket is issued.
System-generated barcodes are designed for verification by the Passlet Scanner app, including verification against a synced project roster if the connection drops during an event.
Limit every ticket to one scan
Under Scan limits:
- Turn on Lifetime total.
- Set the value to
1scan. - Turn on Auto-void after reaching limit.
A Lifetime total of one makes the event ticket one-time scannable. The first valid scan is accepted, but the ticket has no remaining admissions after that scan.
Auto-void after reaching limit permanently voids the pass after its final allowed scan. The final scan is still accepted, so the attendee can enter normally. Passlet then revokes the wallet links, flags the pass for removal from wallets, and rejects later scan attempts.
For the simplest setup, leave When passes can be scanned set to Always valid. For a production event, you can select During date windows and restrict admission to the event date and opening hours.

4. Publish the event ticket template
Review the Apple Wallet and Google Wallet previews, then click Publish.
Passlet will show the Publish this template? confirmation. Click Publish again to create the first published template version.
Publishing is required before you can issue passes. Every publication creates a version, which gives you a controlled way to update the design later.
If the Publish button is unavailable, open the Publish checklist and resolve any missing fields, images, variables, or wallet configuration.
5. Issue event tickets through the Passlet portal
Go to Passes → Issue passes.
- Select
Design Forum Event Ticket. - Turn on Auto-generate External Pass IDs if it is not already, or enter your own registration identifiers. This value can be used to match the passes to records in your existing platform, such as your CRMs or event management system.
- Enter the attendee’s name under Label. This label is shown in the Passlet portal, in the Passlet scanner app, and for Apple users while adding the pass to their wallet.
- Fill in the template variables.
- Click Add pass to create more rows.
- Click Issue pass or Issue N passes.
For Elena’s ticket, the row would contain:
For larger guest lists, use Import from CSV instead of adding every attendee manually.
Issued passes move through Queued, Pending, and Issued while Passlet creates the Apple Wallet and Google Wallet versions.
Screenshot placeholder 8: The Issue passes grid containing the Elena Martin example.

Issue passes from an event form or CRM
You can use the Passlet REST API to connect wallet pass issuance to an external event registration form, ticketing workflow, or CRM.
A typical automated workflow looks like this:
- An attendee completes your registration form.
- Your system creates or updates the attendee in your CRM.
- Your integration sends the registration data to the Passlet REST API.
- Passlet issues the Apple Wallet and Google Wallet event ticket.
- Your system stores the returned pass information and sends the add-to-wallet links.
Use your registration, booking, or order ID as the External Pass ID. External Pass IDs are unique within a workspace, which helps prevent duplicate tickets if the same API request is submitted again.
6. Copy or automatically send the wallet links
Once a pass reaches Issued, it has add-to-wallet links for its enabled wallet providers.
For manual delivery, open Passes, find the attendee, and use Copy wallet link. You can also open the pass detail page to see the Apple Wallet and Google Wallet links.
Paste the appropriate link into an email, SMS, chat message, or registration confirmation.
For automated delivery, use the links returned through the Passlet REST API. Your integration can:
- Send Apple Wallet and Google Wallet buttons in a confirmation email
- Add wallet links to an SMS confirmation
- Store the links in your CRM
- Display them on a registration confirmation page
- Send a replacement link when an attendee requests their ticket again
If your template supports both wallets, you can provide both options and let the attendee choose the wallet used by their phone.

7. Scan the event tickets with the Passlet Scanner iOS app
Passlet Scanner turns an enrolled iPhone into an event ticket scanner.
Connect the iPhone
In the Passlet portal:
- Open Scanner app from the sidebar.
- Find the Setup QR.
On the iPhone:
- Install and open the Passlet Scanner app.
- On Set up scanner, tap Scan setup QR.
- Allow camera access.
- Scan the Setup QR displayed in the Passlet portal.
- Wait for the app to connect to your workspace.
The device will appear under Connected devices in Passlet.
Select the event project
In the iOS app:
- Open Home.
- Select
Design Forum 2026under Projects. - Tap the Scan tab.
Selecting the project limits scanning to the relevant event tickets and keeps event statistics focused on the correct guest list.
Scan an Apple Wallet or Google Wallet pass
Ask the attendee to open their event ticket in Apple Wallet or Google Wallet.
Hold the ticket barcode inside the scanner frame.
For the first valid scan, the operator will see Recognized. Because this template has a lifetime total of one with auto-void enabled, the result also indicates that the scan limit was reached and the pass was voided.
If someone tries to scan the same ticket again, the app will show Not recognized because the pass and its scan code have been revoked.
Operators can review recent activity from the History tab.
Frequently asked questions
Can I create one event ticket for both Apple Wallet and Google Wallet?
Yes. A Passlet template can support Apple Wallet and Google Wallet at the same time. You design each wallet layout in the same editor and use shared variables for attendee data.
Can an Apple Wallet or Google Wallet ticket scan only once?
Yes. Turn on Lifetime total, set it to one scan, and enable Auto-void after reaching limit. The first valid scan is accepted, then the ticket is voided and cannot be scanned again.
Can I issue wallet passes automatically from my registration system?
Yes. The Passlet REST API can issue passes when someone submits an external form, completes an order, or reaches a specific stage in your CRM.
Do attendees need the Passlet Scanner app?
No. Attendees add the event ticket to Apple Wallet or Google Wallet on their own phone. Only event staff need the Passlet Scanner app to validate tickets.


